
How to Clean Face Painting Brushes and Sponges: The Complete Guide
Knowing how to clean face painting brushes and sponges properly is one of the habits that separates a professional kit from one that deteriorates quickly. Brushes that are not cleaned properly shed, splay, and transfer old colour into fresh designs. Sponges that are not dried correctly develop odour and bacteria. And the ferrule — the chrome-plated brass sleeve connecting the bristles to the handle — is damaged far more easily than most beginners realise. This guide covers how to clean, dry, store, and extend the life of your face painting brushes and sponges, including what to do at events and what to do after.
Why Cleaning Matters Beyond Hygiene
The obvious reason to clean face painting brushes and sponges is hygiene — brushes used on skin carry bacteria, oil, and skin cells that accumulate with each use. But there are two less obvious reasons that matter just as much for the quality of your work:
Colour contamination
Residual paint left in a face painting brush after use bleeds into the next colour you load. A brush that painted a deep red and was only rinsed in water — not fully cleaned — will carry a pink tinge into the white paint you load next. Over time, improperly cleaned brushes produce dull, muddy colours that even good split cakes and solid paints cannot compensate for. Clean brushes produce vivid, accurate colour every time.
Brush longevity
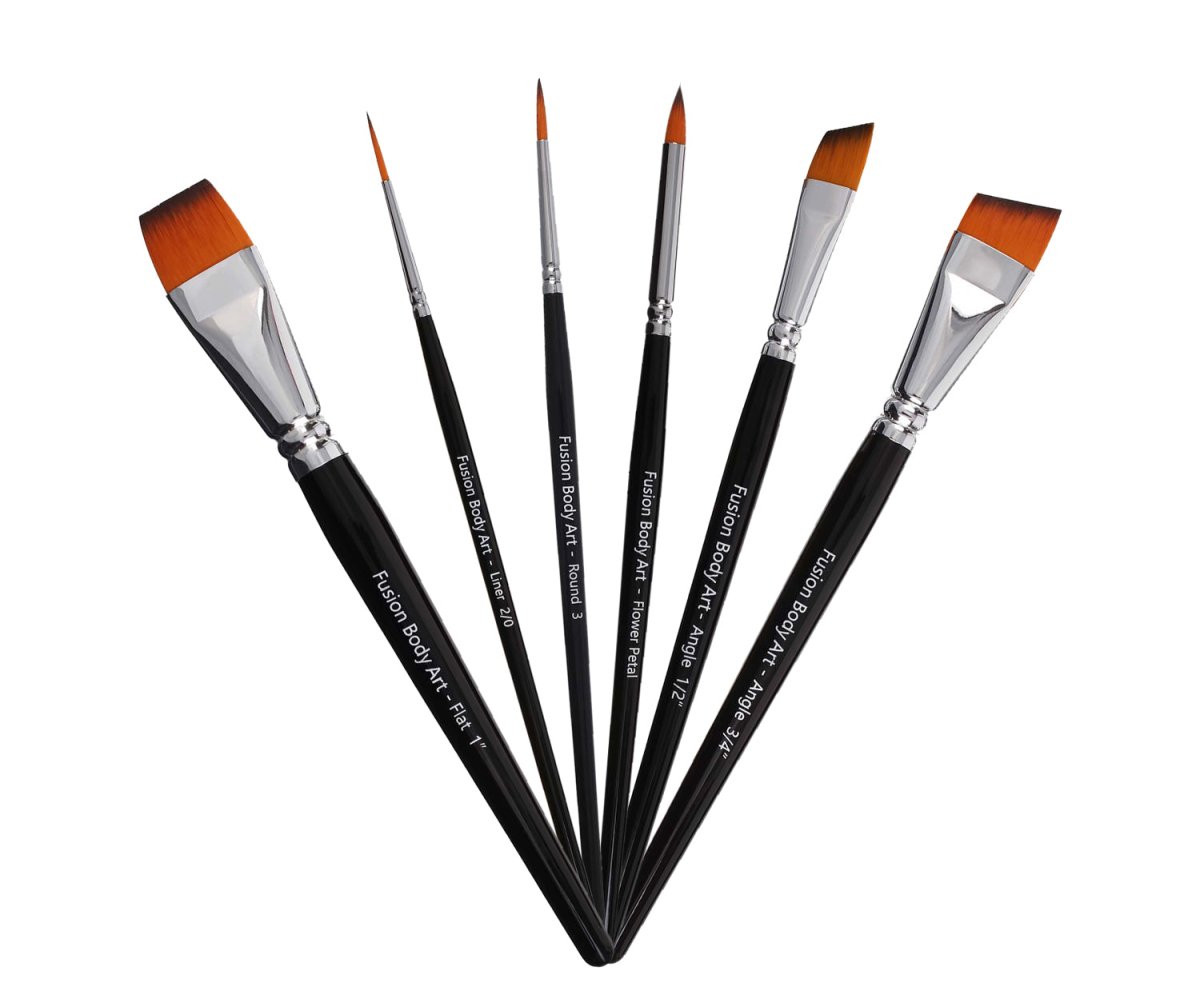
Face painting brushes are an investment. Professional-grade Fusion Body Art face painting brushes use premium Korean synthetic hair with precisely shaped tips. Incorrect cleaning — particularly water entering the ferrule — destroys that shape permanently. A brush cleaned correctly after every event lasts 12 to 36 months under regular professional use. The same brush cleaned incorrectly may last a fraction of that.
Understanding the Ferrule — The Most Important Thing Beginners Miss
The ferrule is the chrome-plated brass sleeve that holds the bristles to the brush handle using adhesive. It is the metal ring visible between the bristle head and the handle on every professional face painting brush — and the most vulnerable part that most beginners accidentally damage.
Inside the ferrule, the bristles are bonded to the handle using this adhesive.
- Stand the brush upright in water while painting — water travels into the ferrule, softening the adhesive
- Rinse the whole brush under running water — wet only the bristle head, never the ferrule or handle
- Dry the brush upright (bristles up) — water drains back into the ferrule as it dries
- Rub the bristles in circular motions — this twists and splays the bristle arrangement permanently
- Store brushes while damp — moisture trapped in the ferrule accelerates adhesive breakdown
When the ferrule adhesive fails, the bristles loosen, the brush begins to shed during use, and the tip loses its shape. There is no repair. Protecting the ferrule is the single most important brush care habit — and the one that most brush care guides skip entirely.
Why Water-Activated Face Paint Is Easier to Clean Than Other Types
One advantage of Fusion Body Art's water-activated formula that rarely gets mentioned is how much easier it is to clean from brushes and sponges compared to oil-based or alcohol-activated face paint. Because the formula is water-soluble — the same chemistry that activates it also releases it — water and a gentle soap is all that is needed to remove it completely from synthetic bristles. No specialist solvents, no oils, no alcohol required.
This means cleaning a Fusion Body Art brush correctly takes 60 seconds, not 10 minutes. It also means the bristles are never exposed to harsh solvents that degrade synthetic hair over time. For more on how the water-activated formula works, see our complete water activated face paint guide.
The Two-System Approach: Event Cleaning and Post-Event Deep Clean
Professional face painters use two distinct cleaning systems — one for during an event, and one for after. Treating them the same way leads to either a contaminated event kit or a post-event cleaning session that takes far longer than it should.
System 1: Event Cleaning — Between Every Client
At events, full deep cleaning between clients is not practical. The goal is to prevent cross-contamination — colour transfer between clients and bacterial transfer from one child's skin to the next. The event cleaning system requires three water containers:
| Container | Contents | Purpose |
|---|---|---|
| Container 1 | Clean water + a small amount of brush soap | Initial rinse and brush wash between clients |
| Container 2 | Clean water only | Final rinse after soap wash — removes soap residue before next client |
| Container 3 | Clean water only | Paint activation only — never used for rinsing dirty brushes |
Between clients: dip the brush in Container 1, work the bristles gently between your fingers, dip in Container 2, blot on a clean cloth or paper towel, and continue. Change Container 1 and 2 water regularly — as soon as the water becomes visibly pigmented or cloudy, replace it with fresh clean water.
System 2: Post-Event Deep Clean — After Every Event
The post-event clean is the full wash that restores your kit to professional condition for the next booking. This is done at a sink, not in a water container, and covers every brush and sponge used during the event.
How to Clean Face Painting Brushes — Step by Step
The short answer: wet only the bristles, apply brush soap, work gently back and forth until the water runs clear, reshape the tip, and lay flat to dry — never the ferrule, never upright.
- Wet only the bristle head. Hold the brush with bristles pointing down. Run lukewarm water over the bristles only — keep the ferrule and handle dry. Hot water can set paint into the bristles and degrade synthetic hair over time.
- Apply brush soap to the bristles. A small amount of Brush and Body Wash on the bristles is enough for most brushes. Work it in gently with your fingers — never scrub bristles against a hard surface or rub in circles.
- Work the bristles with your fingers. Hold the bristle head between two fingers and work the soap through with a gentle back-and-forth motion, not a circular one. Continue until the water running from the bristles is clear — no colour should remain.
- Rinse thoroughly. Rinse the bristles under lukewarm water, again keeping the ferrule dry, until all soap is removed. Soap residue left in the bristles affects paint loading on the next use.
- Reshape the bristles. While the brush is still damp, gently reshape the bristle tip with your fingers — round brushes to a point, flat brushes to their original flat edge, angle brushes to their angle. This is the step most people skip and the reason brushes lose their shape.
- Lay flat to dry. Place the brush on a clean cloth or towel, bristles extended over the edge if possible, and allow to dry completely. Do not stand brushes upright (bristles up) to dry — water drains back into the ferrule. Do not stand them on their bristles — this permanently splays the tip.
 Shop Brush and Body Wash
How to Clean Face Painting Sponges — Step by Step
The short answer: rinse in cool water immediately, press soap through by hand until clear, squeeze gently, and air dry completely before storing. Never hot water, never wring, never store damp.
- Rinse in cool to lukewarm water immediately after use. Do not use hot water — heat sets water-activated paint into the sponge foam, making it much harder to remove. Rinse as soon as possible after the event rather than leaving sponges overnight.
- Apply soap and work it through by pressing and releasing. Apply a small amount of brush soap or gentle hand soap to the wet sponge. Press the sponge between your palms repeatedly — do not wring or twist, which can tear the foam. The pressing action forces the soap and water through the porous sponge and releases the trapped paint.
- Continue until the water runs clear. Rinse and repeat the pressing action until no colour is visible in the water coming from the sponge. Heavily loaded sponges from a full event may need three or four rounds of soap and rinse.
- Squeeze out excess water gently. Press the sponge between two flat palms to remove excess water — do not wring. Place on a clean, dry towel.
- Allow to air dry completely before storing. This is critical. A sponge stored while still damp in a closed bag or kit case develops odour within 24 to 48 hours and bacteria within days. Allow 4 to 8 hours of open air drying before packing away.
The Mesh Bag Machine Wash — The Easiest Post-Event Sponge Clean
The fastest way to deep clean a batch of petal sponges after an event is to place them in the Art Factory Black Mesh Sponge Bag and run it through the washing machine. The mesh bag protects the sponges from the drum while allowing full water and detergent penetration.

Australian machine settings: Use the delicate or gentle cycle on cold — Australian washing machines typically label this "Delicates," "Hand Wash," or "Gentle." Do not use a warm or hot wash setting, which sets residual paint into the sponge foam and can degrade the material. Skip fabric softener entirely — it leaves a coating on the sponge surface that affects paint loading. Remove the carabiner before washing. After the cycle, open the bag and allow sponges to air dry flat — do not tumble dry.
The mesh bag also works at events — used sponges go straight into it during the day, keeping them separated from clean tools and allowing them to air while you paint. It attaches to your chair or kit case with the carabiner clip.
Drying and Storage
| Item | Drying Method | Storage | Never Do This |
|---|---|---|---|
| Round and detail brushes | Lay flat on a clean cloth, bristles over the edge | Upright in a brush case or roll once fully dry | Stand in water, dry upright on bristle tips, store damp |
| Flat and angle brushes | Lay flat, bristles reshaped to their flat edge | Flat in a brush roll or case | Store bent or pressed against other tools |
| Petal sponges | Press flat on a dry towel, open air minimum 4 hours | Mesh bag or open tray — never airtight while damp | Store damp in a sealed bag or kit case |
Australian-Specific Storage Tips
Australia's climate creates specific risks for face painting kit storage that painters in temperate climates do not face.
Hot cars
A car parked in direct sun in an Australian summer reaches 60–70°C inside within minutes. At these temperatures, brush handles warp and crack, sponge foam degrades, and the adhesive bonding bristles to ferrules softens — permanently weakening brushes that were otherwise in good condition. Never leave a face painting kit in a car between events. Transport it, unpack it, and store it in a cool, shaded environment.
Humidity (Queensland, Northern Territory, Northern NSW)
High ambient humidity means sponges and brushes take significantly longer to dry than in temperate conditions. Allow double the drying time — minimum 8 hours — before storing. A small fan aimed at the laid-out brushes and sponges accelerates drying substantially. Never store in a sealed kit case before full drying in humid climates.
Dry heat (South Australia, Western Australia)
In very dry conditions, brushes dry faster but brush handles — particularly wooden ones — can crack if exposed to repeated cycles of wet cleaning and rapid drying in extreme dry heat. A light conditioning brush soap, rather than a harsh dish soap or detergent, reduces the stress on wooden handles over time.
When to Replace — Not When to Keep Cleaning
Knowing when to stop cleaning and start replacing is as important as knowing how to clean. No amount of washing recovers a brush that has reached the end of its useful life.
| Sign | What It Means | Action |
|---|---|---|
| Bristles splay permanently and do not return to shape after reshaping | Bristle arrangement is permanently deformed — usually from circular scrubbing or being stored on the tip | Replace the brush |
| Bristles shed during painting | Ferrule adhesive has failed — water entered the ferrule repeatedly | Replace the brush — shed bristles on a child's face are a hygiene and safety issue |
| Brush leaves streaky marks it did not previously leave | Bristle tip is damaged or paint residue has built up and hardened in the bristles | Deep clean first — if the problem persists after a thorough clean, replace |
| Sponge smells despite thorough washing | Bacteria embedded in the foam that soap and water cannot fully remove | Discard the sponge — sponges are inexpensive and should not be kept past their usable life |
| Sponge surface feels slimy | Bacterial buildup on the sponge surface | Discard immediately |
| Sponge tears or breaks apart during washing | Foam has degraded from heat, age, or improper washing | Replace — torn sponge foam leaves fragments on skin |
Frequently Asked Questions
How do you clean face painting brushes?
To clean face painting brushes: wet only the bristles under lukewarm water, apply brush soap, work it through the bristles back and forth until the water runs clear, reshape the tip, and lay flat to dry. Use Brush and Body Wash or a gentle soap. Never wet the ferrule, never rinse the full brush, and never dry standing upright.
How do you clean face painting sponges?
To clean face painting sponges: rinse in cool water immediately after use, apply soap, press and release until the water runs clear, squeeze gently, and air dry completely before storing. Do not use hot water — it sets paint into the foam. For a post-event batch clean, place sponges in the mesh sponge bag and run a cool gentle cycle in the washing machine.
How often should you clean face painting brushes?
Rinse between every client at events. Do a full soap clean after every event. Residual paint, bacteria, and skin oil build up in brushes with every use — regular full cleaning prevents colour contamination and extends brush life significantly.
What soap is best for cleaning face painting brushes?
Brush and Body Wash by Jest Paint, available through Fusion Body Art, is formulated specifically for water-activated face paint on synthetic bristles using natural, gentle ingredients. It removes pigment thoroughly without stripping the bristle hair, and is gentle enough to use on skin — making it the only product in your kit that cleans both brushes and hands. Gentle hand soap or baby shampoo work in the absence of a dedicated brush soap, but dedicated brush soap cleans more thoroughly and is gentler on bristles over time.
Can you put face painting sponges in the washing machine?
Yes. Place sponges in the Art Factory Mesh Sponge Bag, remove the carabiner, and run on the delicate or gentle cycle on cold. Do not use hot water, fabric softener, or tumble dry. Air dry fully before storing. This is the easiest post-event deep clean for a full batch of petal sponges.
What is the ferrule and why does it matter?
The ferrule is the chrome-plated brass sleeve between the bristles and the brush handle. It holds the bristles in place using adhesive. Water entering the ferrule — from standing brushes in water, rinsing too high, or drying upright — softens this adhesive over time, causing the brush to shed. Protecting the ferrule is the most important brush care habit.
How do you clean face painting brushes between clients at events?
Use three water containers — soap water, clean rinse water, and a separate activation container. Between clients, rinse the brush in the soap water, then the clean rinse, blot on a cloth, and continue. Use one fresh sponge per client — sponges are not rinsed and reused between faces at events.
When should you replace face painting brushes?
When the bristles permanently splay, the brush sheds during use, the ferrule wobbles, or the brush leaves streaky marks that persist after a full clean. With correct care, professional synthetic face painting brushes last 12 to 36 months under regular event use.
How do you store face painting brushes and sponges?
Store brushes flat or bristle-end up in a brush roll or case — only after fully dry. Store sponges in a breathable mesh bag or open tray — never airtight while damp. In Australia, never leave the kit in a hot car between events — temperatures inside parked cars reach levels that warp handles, degrade foam, and weaken ferrule adhesive.
Shop Brush Care and Face Painting Tools
Everything mentioned in this guide is available from Fusion Body Art:
→ Brush and Body Wash by Jest Paint — natural, gentle formula for brushes and skin. The professional standard for water-activated face paint
→ Art Factory Black Mesh Sponge Bag with Carabiner — for washing machine sponge cleaning and event sponge hygiene. Attaches to your chair with the carabiner clip.
→ Fusion Body Art Face Painting Brushes — the complete range of professional flat, angle, and round brushes for every technique
→ Fusion Body Art Petal Sponges 6 Pack — one per client for professional hygiene at events
Browse the full range at fusionbodyart.com — worldwide shipping.
Related guides: How to Use Split Cakes for Face Painting · Water Activated Face Paint — Complete Guide


