


How to Paint Teardrops in Face Painting: Line Work Drills and Technique Guide with Leanne Courtney
Face painting teardrops and line work are the foundation of almost every face painting design — princess crowns, butterfly edging, floral masks, animal faces, and cheek art all rely on the same fundamental strokes. The good news is that teardrops are a physical skill, not an artistic one. They are built through repetition and muscle memory, not natural talent. This guide covers the three teardrop variations every beginner face painter needs, the practice drills Leanne Courtney recommends for building consistency, the focal point principle that separates professional-looking designs from amateur ones, and how to read your paint and brush mid-session to keep your line work crisp.
The Right Brush and Paint for Teardrops
Before starting any drills, the brush and paint need to be in the right condition. Most teardrop and line work uses white paint as the base because white is opaque, covers over other colours cleanly, and is the most forgiving colour to correct if a stroke goes wrong.
Which brush
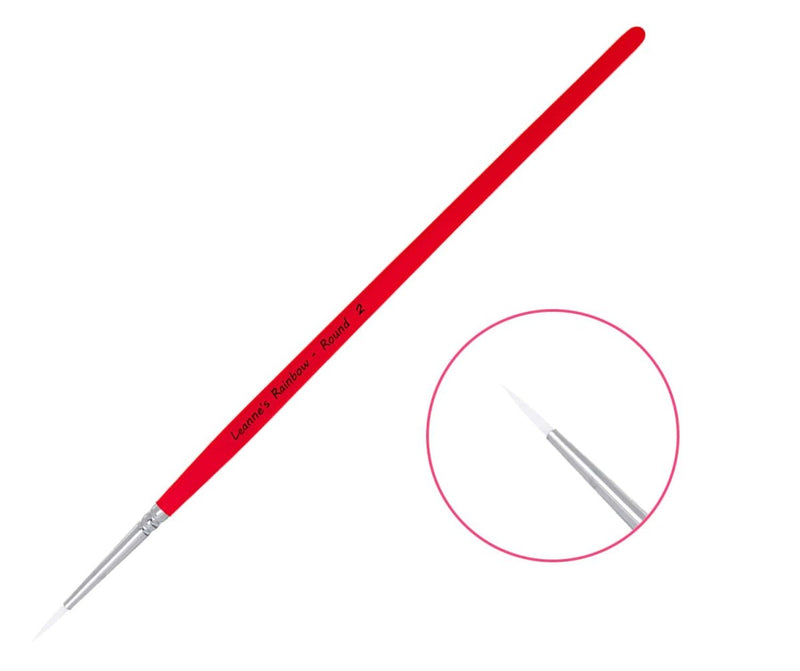
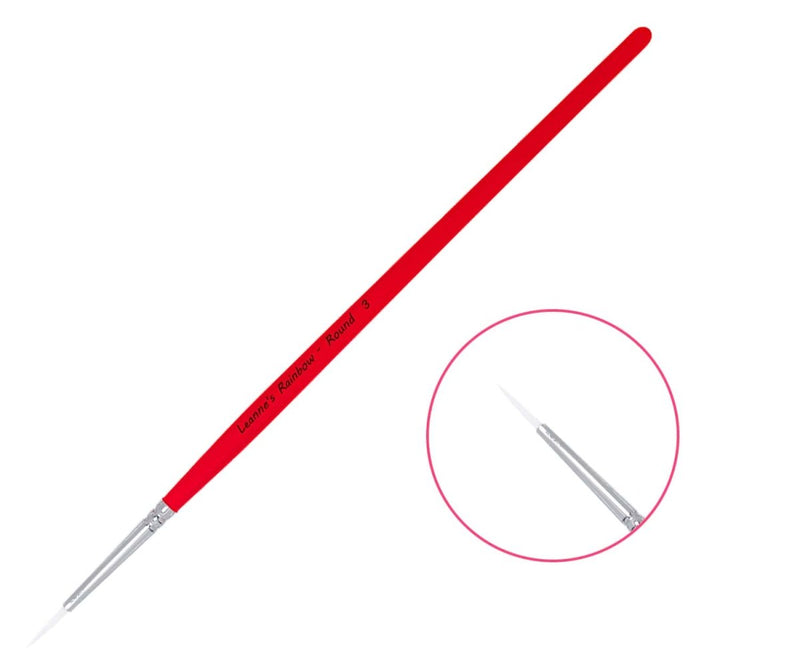
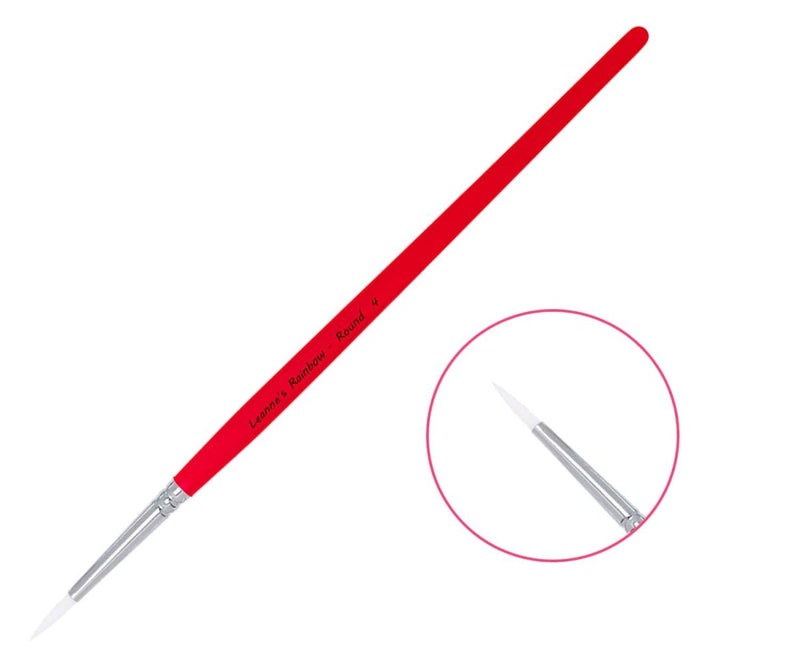
Leanne’s Rainbow Round 3 is the workhorse for teardrops — it handles the majority of standard teardrops, swirls, and line work across most designs. The Rainbow Round 4 produces thicker teardrops and larger dots, best for designs on wider foreheads. The Rainbow Round 2 is for fine outline work and delicate details where the Round 3 is too wide. For most teardrop drills, start with the Rainbow Round 3.
Preparing the white paint
Load Fusion Body Art Prime Paraffin White before starting any drill session — not during it. Leanne activates the white at the beginning of every session, working it to a creamy consistency before touching any skin.

- Spritz the Paraffin White once or twice with the water bottle.
- Load the Rainbow Round 3 and work the paint in the lower, wetter area of the cake first — this creates the initial creamy base.
- Pull some of that wet paint up into the drier area of the cake and keep mixing — this builds consistency throughout the paint rather than having wet and dry patches.
- Roll the brush between your fingers periodically to maintain the pointed tip during mixing.
- The paint is ready when it holds a smooth, creamy consistency on the bristle face — opaque, not running, not cracking.
The Three Face Painting Teardrop Variations
The face painting teardrop is the single most important stroke in face painting. Every face painter needs to learn it in three forms — and once you can do all three consistently, the majority of princess crowns, floral details, and design accents are within reach.
Variation 1 — The Straight Teardrop
The foundational stroke. Place the full belly of the brush on the skin at the widest point of the teardrop, then pull the brush in a straight line while simultaneously lifting it off the skin. As you pull and lift, the bristles narrow toward a point. The teardrop begins thick where the brush belly first touched and ends at a sharp point where the bristles last touched the skin.
Used for: princess crown centre lines, straight line clusters, tiger stripe lines, design structural elements.
Variation 2 — The Curved Teardrop
Same motion as the straight teardrop but with a curve as you pull. Place the brush belly down, then pull and lift while curving the stroke. The result is a curved teardrop that naturally suits floral accents, butterfly wing edging, and decorative design elements where a straight line would be too rigid.
Used for: floral design accents, curved butterfly edging, decorative line work around design elements.
Variation 3 — The Reverse Teardrop (Point to Head)
The reverse of the standard teardrop — you start at the point and press the brush down as you move, ending at the thick head. Place just the tip of the brush on the skin first, then push forward while pressing the brush down until the full belly is in contact. This creates a teardrop that builds from thin to thick rather than thick to thin.
Used for: specific design elements where the thick end needs to come at the end of the stroke, princess crown outer sweeps, design starts where a thin entry is preferred.
The Focal Point Principle
All teardrops and lines within a cluster must point toward the same imaginary focal point. This is the single most important concept in teardrop technique — and the one that most immediately separates professional-looking designs from beginner ones.
A focal point is an imaginary spot — it could be the inner corner of the eye, the tip of the nose bridge, the centre of the forehead, or a specific point within a flower cluster. Every teardrop in the cluster should have its pointed tip directed toward this same spot, as if all the teardrops are radiating outward from a shared centre.
When teardrops point in different directions, the design looks scattered and unresolved. When they all point toward the same focal point — even if the strokes themselves are not perfectly consistent — the design reads as intentional and balanced.
The Crackle Test — Reading Your Paint Mid-Session
One of the most practical techniques Leanne teaches is the crackle test — a method for identifying when the paint on your brush has become too dry mid-session and needs refreshing before continuing.
When paint dries in the bristles between strokes — from the ambient air, from the brush being held too long without use, or from the paint drying on the cake surface — the edges of teardrops and lines start to look crackled or broken rather than smooth and crisp. The stroke that used to produce a clean, smooth edge now produces one that looks slightly granular.
This is the crackle signal. When you see it:
- Stop the stroke mid-design if needed.
- Dip the brush in clean water and reload from the cake.
- Go back over the crackled area with the freshly loaded brush — the new paint fills and smooths the broken edge.
- Continue painting.
Line Work with Colour
Once teardrops are consistent in white, adding colour opens up a range of design possibilities. Coloured teardrops and line work are produced in two ways:
Picking up end colours from a split cake
Load the Rainbow Round 2 with a small amount of water, then drag the very tip across the dark end colour of a split cake — the concentrated edge colour that loads onto the brush tip as a pure, rich colour. This is how Leanne outlines butterflies and adds coloured edge detail to designs without needing separate solid colour pots for each design.
Loading from solid colour pots
For heavier coloured line work, load a Fusion Body Art solid colour from a pot using the same technique as white — wet the brush, work the paint to a creamy consistency, test on the back of the hand, then apply. Coloured teardrops in designs are produced with the same three-variation technique as white — the brush does not change, only the colour does.
Dots — The Rainbow Round 4’s Specialty
The Rainbow Round 4 is Leanne’s primary dot brush — and producing round, consistent dots is a skill unto itself.
- Press straight down and lift straight up. Do not drag. A drag creates a smear; a clean press-and-lift creates a round dot.
- Vary dot size by varying pressure. Press harder for a larger dot, lighter for a smaller one. The Rainbow Round 4’s tip allows significant size variation within a single stroke.
- Keep the brush perpendicular to the skin. If the brush is angled, the dot becomes oval rather than round.
- Use dots as focal points in teardrop clusters. A small dot placed where all the teardrop points converge gives the cluster a defined centre and pulls the eye inward.
Practice Drills — Building Muscle Memory
Leanne recommends daily practice for building muscle memory — even five minutes a day is more effective than an occasional long session. The face painting teardrop drills below progress from the foundational stroke to a complete design element.
| Drill | What to Practice | Goal |
|---|---|---|
| Drill 1 — Straight teardrops in a row | Paint 10 straight teardrops in a row, all the same size. Then 10 smaller. Then 10 larger. | Consistent press-and-lift with varied pressure. Building size control. |
| Drill 2 — Curved teardrops | Paint 10 curved teardrops curving in the same direction, then 10 curving the other way. | Wrist control during the pull — maintaining the curve without breaking the stroke. |
| Drill 3 — Focal point cluster | Mark an imaginary centre point. Paint 5–7 teardrops all pointing toward it, fanning outward like petals. | Consistent orientation. The focal point principle in practice. |
| Drill 4 — Graduated cluster | Start with one large central teardrop pointing toward the focal point, add progressively smaller ones on each side. | Size graduation within a cluster — the foundation of a princess crown centre. |
| Drill 5 — Dots at varying pressure | Paint a row of 10 dots, pressing progressively harder from left to right. | Pressure control — the ability to place the right size dot in the right place quickly. |
| Drill 6 — Mixed cluster | Combine a graduated teardrop cluster with dots at the focal point and curved teardrops on the outer edges. | Combining all three variations in a single design element — the complete princess crown centre. |
Troubleshooting Face Painting Teardrops and Line Work
The short answer to most teardrop problems: if the tip is blunt, lift the brush more at the end; if edges crackle, reload the brush; if teardrops bleed, reduce water; if the cluster looks scattered, check all teardrops point toward the same focal point.
| Problem | Cause | Fix |
|---|---|---|
| Teardrop tip is blunt, not sharp | Not lifting the brush fully at the end of the stroke | Consciously lift the brush off the skin as you complete the pull. The bristles must leave the surface to form the point. |
| Edges are crackled or broken | Paint has dried in the bristles mid-session | Re-wet the brush, reload from the cake, go back over the crackled area with fresh paint. |
| Teardrops bleed at the edges | Too much water in the brush — paint too thin | Blot the brush more firmly before loading the cake. Paint should feel like toothpaste on the bristle face. |
| Brush tip splays mid-stroke | Bristles have lost their point from use | Roll the brush between your fingers to restore the point. |
| Teardrops look scattered | Not all teardrops pointing toward the same focal point | Choose a clear focal point before starting the cluster. Check brush orientation before each stroke. |
| Line work pale over coloured base | White paint not opaque enough | Use Fusion Prime Paraffin White — formulated for high opacity over other colours. |
Frequently Asked Questions
How do you do a teardrop in face painting?
To do a face painting teardrop: load the Leanne’s Rainbow Round 3 with creamy white paint. Place the full belly of the brush on the skin at the widest point of the teardrop, then pull while simultaneously lifting the brush off the skin. The bristles narrow as they leave the surface, creating the sharp point.
What are the three teardrop variations?
The straight teardrop — press and pull in a straight line while lifting. The curved teardrop — same motion with a curve as you pull. The reverse teardrop — start at the point and press down as you move, building from thin to thick. All three appear in real designs and all need to be practised.
What is the focal point principle?
All teardrops and lines in a cluster should point toward the same imaginary centre point. When teardrops point in different directions the design looks scattered. When they all orient toward the same focal point the design reads as intentional and professional.
How often should you practise teardrops?
Daily is ideal — even five minutes builds muscle memory faster than occasional long sessions. Once a week is the minimum for meaningful improvement. Practise on the arm rather than a board — skin gives more accurate feedback on paint consistency and stroke feel.
What is the crackle test?
When paint dries in the brush mid-session, the edges of teardrops and lines look crackled or broken. This is the signal to re-wet the brush and reload from the cake. Fresh paint from a well-loaded brush should always produce a smooth, clean edge.
Why doesn’t my teardrop have a sharp point?
Almost always because the brush was not lifted off the skin at the end of the stroke. The sharp tip is created by the bristles leaving the skin — they cannot form a point while still in contact. Consciously lift the brush off the skin as you complete the pull.
What paint do you use for teardrops?
Fusion Prime Paraffin White for white teardrops — high opacity, covers other colours cleanly, does not sink into skin.
What brush size do you use for face painting teardrops?
Leanne’s Rainbow Round 3 is the standard for most face painting teardrops. Use the Rainbow Round 2 for fine detail and thin lines, and the Rainbow Round 4 for larger teardrops and dots on bigger faces or foreheads.
Shop the Products for Teardrops and Line Work
All Fusion Body Art products mentioned in this guide are available from fusionbodyart.com with worldwide shipping:
→ Leanne’s Rainbow Round 3 — the workhorse brush for teardrops, swirls, and standard line work
→ Leanne’s Rainbow Round 4 — for larger teardrops, dots, and designs on bigger foreheads
→ Leanne’s Rainbow Round 2 — for fine detail, thin colour outlines, and precise line work
→ Fusion Prime Paraffin White — high-opacity white for teardrops, line work, and all white detail
→ Fusion Bundle Saver Kits — complete beginner face painting kits including brushes, paints, and sponges
Related guides: Face Painting Brush Guide — Which Brush Does What


